The CMU-Sphinx Speech Recognition Toolkit: First Steps

Some Background
I recently installed Ubuntu 14.04 on my Lenovo Yoga, and it’s time to reinstall SPHINX.
When I installed SPHINX for the first time in September 2015, it was not a fun experience. I originally followed the instructions on CMU’s website, but I couldn’t seem to get it right. I tried a number of different approaches, using different blogs as guides, but I got nowhere. I first tried downloading Pocketsphinx, Sphinxtrain, Sphinxbase and Sphinx4 from CMU’s downloads page, but that didn’t work. I also tried installing the version hosted on SourceForge, but no luck there either. I finally decided to try cloning and installing the version on GitHub, and that seemed to do the trick. However, at the end of this post I show how to install CMUCLMTK from SourceForge, because they don’t have it on GitHub.
So, I’m going to go through installation process again here.
First, in case it’s relevant for others I’m going to show a little info about my current setup.
josh@yoga:~$ lsb_release -a
No LSB modules are available.
Distributor ID:	Ubuntu
Description:	Ubuntu 14.04.3 LTS
Release:	14.04
Codename:	trusty
You can see the exact kernel on my version of Ubuntu below:
josh@yoga:~$ uname -a
Linux yoga 3.19.0-43-generic #49~14.04.1-Ubuntu SMP Thu Dec 31 15:44:49 UTC 2015 x86_64 x86_64 x86_64 GNU/Linux
Installing Dependencies
To install on Ubuntu (or any other unix-like system), we first need to install a few dependencies. Here’s the list:
| Name | Homepage | Description |
|---|---|---|
| gcc | GNU Compiler Collection | GCC development is a part of the GNU Project, aiming to improve the compiler used in the GNU system including the GNU/Linux variant. |
| automake | Automake | Tool for generating GNU Standards-compliant Makefiles. |
| autoconf | Autoconf | Autoconf is an extensible package of M4 macros that produce shell scripts to automatically configure software source code packages. |
| libtool | GNU Libtool | GNU libtool is a generic library support script. Libtool hides the complexity of using shared libraries behind a consistent, portable interface. |
| bison | GNU Bison | Bison is a general-purpose parser generator that converts an annotated context-free grammar into a deterministic LR or generalized LR (GLR) parser employing LALR(1) parser tables. |
| swig | SWIG | SWIG is a software development tool that connects programs written in C and C++ with a variety of high-level programming languages. |
| python-dev | Python Development Package | Header files, a static library and development tools for building Python modules, extending the Python interpreter or embedding Python in applications. |
| libpulse-dev | PulseAudio Development Package | Headers and libraries for developing applications that access a PulseAudio sound server via PulseAudio’s native interface. |
Here’s the command to get everything at once:
sudo apt-get install gcc automake autoconf libtool bison swig python-dev libpulse-devInstalling CMU-SPHINX
Installing sphinxbase
Whether you’re using pocketsphinx or sphinx4, you’re going to need to install sphinxbase first.
The README for the sphinxbase repository says:
This package contains the basic libraries shared by the CMU Sphinx trainer and all the Sphinx decoders (Sphinx-II, Sphinx-III, and PocketSphinx), as well as some common utilities for manipulating acoustic feature and audio files.
To get sphinxbase running, we need to clone the repository from GitHub and then run a few commands to configure and install it in the right spot.
I usually make a folder on my desktop to store the source code, and then when it’s all been installed you can just throw away all those extra files.
So, first we need to get to the Desktop, make a new directory and cd into it.
josh@yoga:~$ cd Desktop/
josh@yoga:~/Desktop$ mkdir sphinx-source
josh@yoga:~/Desktop$ cd sphinx-source/
josh@yoga:~/Desktop/sphinx-source$
Now we can clone the source from GitHub, and you should get something like this:
josh@yoga:~/Desktop/sphinx-source$ git clone https://github.com/cmusphinx/sphinxbase.git
Cloning into 'sphinxbase'...
remote: Counting objects: 10302, done.
remote: Total 10302 (delta 0), reused 0 (delta 0), pack-reused 10302
Receiving objects: 100% (10302/10302), 8.95 MiB | 1.46 MiB/s, done.
Resolving deltas: 100% (8092/8092), done.
Checking connectivity... done.
Now can see that our once empty dir sphinx-source now has a new directory, sphinxbase:
josh@yoga:~/Desktop/sphinx-source$ la
sphinxbase
Let’s look at what’s inside this new dir, sphinxbase:
josh@yoga:~/Desktop/sphinx-source$ la sphinxbase/
AUTHORS       doc      indent.sh  Makefile.am  README.md         src   win32
autogen.sh    .git     LICENSE    NEWS         sphinxbase.pc.in  swig
configure.ac  include  m4         README       sphinxbase.sln    test
Now we need to run the autogen.sh shell script you can see in the sphinxbase directory. This will generate our Makefiles and other important scripts for compiling and installing. We’re going to get a long output here, so I only show some of it here:
josh@yoga:~/Desktop/sphinx-source$ cd sphinxbase/
josh@yoga:~/Desktop/sphinx-source/sphinxbase$ ./autogen.sh
**Warning**: I am going to run `configure' with no arguments.
If you wish to pass any to it, please specify them on the
`./autogen.sh' command line.

processing .
Running libtoolize...
libtoolize: putting auxiliary files in `.'.
libtoolize: copying file `./ltmain.sh'
libtoolize: putting macros in AC_CONFIG_MACRO_DIR, `m4'.
libtoolize: copying file `m4/libtool.m4'
libtoolize: copying file `m4/ltoptions.m4'
libtoolize: copying file `m4/ltsugar.m4'
libtoolize: copying file `m4/ltversion.m4'
libtoolize: copying file `m4/lt~obsolete.m4'
Running aclocal  ...
Running autoheader...
Running automake --foreign --copy  ...
configure.ac:12: installing './compile'
                        .
                        .
                        .
config.status: creating test/regression/testfuncs.sh
config.status: creating test/regression/Makefile
config.status: creating swig/Makefile
config.status: creating swig/python/Makefile
config.status: creating include/config.h
config.status: creating include/sphinx_config.h
config.status: executing depfiles commands
config.status: executing libtool commands
Now type `make' to compile the package.
Before we charge right ahead to compilation with the make command, lets take a look at what new files were generated from running autogen.sh.
josh@yoga:~/Desktop/sphinx-source/sphinxbase$ la
aclocal.m4      config.log     doc         LICENSE      missing        sphinxbase.pc.in  win32
AUTHORS         config.status  .git        ltmain.sh    NEWS           sphinxbase.sln    ylwrap
autogen.sh      config.sub     include     m4           py-compile     src
autom4te.cache  configure      indent.sh   Makefile     README         swig
compile         configure.ac   install-sh  Makefile.am  README.md      test
config.guess    depcomp        libtool     Makefile.in  sphinxbase.pc  test-driver
You can see that we now have the scripts needed for compiling, configuring, and installing sphinxbase. Now we can run make to do our installation. As nicely summarized on Wikipedia, “Make is a utility that automatically builds executable programs and libraries from source code by reading files called Makefiles which specify how to derive the target program.”
When you run the make command without any arguments (still in the local version of the cloned sphinxbase repository), you will get a long output that ends something like this:
josh@yoga:~/Desktop/sphinx-source/sphinxbase$ make
                        .
                        .
                        .
libtool: link: (cd ".libs" && rm -f "_sphinxbase.so.0" && ln -s "_sphinxbase.so.0.0.0" "_sphinxbase.so.0")
libtool: link: (cd ".libs" && rm -f "_sphinxbase.so" && ln -s "_sphinxbase.so.0.0.0" "_sphinxbase.so")
libtool: link: ar cru .libs/_sphinxbase.a  _sphinxbase_la-sphinxbase_wrap.o
libtool: link: ranlib .libs/_sphinxbase.a
libtool: link: ( cd ".libs" && rm -f "_sphinxbase.la" && ln -s "../_sphinxbase.la" "_sphinxbase.la" )
make[2]: Leaving directory `/home/josh/Desktop/sphinx-source/sphinxbase/swig/python'
make[2]: Entering directory `/home/josh/Desktop/sphinx-source/sphinxbase/swig'
make[2]: Nothing to be done for `all-am'.
make[2]: Leaving directory `/home/josh/Desktop/sphinx-source/sphinxbase/swig'
make[1]: Leaving directory `/home/josh/Desktop/sphinx-source/sphinxbase/swig'
make[1]: Entering directory `/home/josh/Desktop/sphinx-source/sphinxbase'
make[1]: Nothing to be done for `all-am'.
make[1]: Leaving directory `/home/josh/Desktop/sphinx-source/sphinxbase'
The next step is the last step. Run the command sudo make install. Root permission is important, because otherwise you will get some error without any Permision Denied warning.
You will see a good amount of output with some sections that look like this:
josh@yoga:~/Desktop/sphinx-source/sphinxbase$ sudo make install
                        .
                        .
                        .
----------------------------------------------------------------------
Libraries have been installed in:
   /usr/local/lib

If you ever happen to want to link against installed libraries
in a given directory, LIBDIR, you must either use libtool, and
specify the full pathname of the library, or use the `-LLIBDIR'
flag during linking and do at least one of the following:
   - add LIBDIR to the `LD_LIBRARY_PATH' environment variable
     during execution
   - add LIBDIR to the `LD_RUN_PATH' environment variable
     during linking
   - use the `-Wl,-rpath -Wl,LIBDIR' linker flag
   - have your system administrator add LIBDIR to `/etc/ld.so.conf'

See any operating system documentation about shared libraries for
more information, such as the ld(1) and ld.so(8) manual pages.
----------------------------------------------------------------------
                        .
                        .
                        .
----------------------------------------------------------------------
Libraries have been installed in:
   /usr/local/lib/python2.7/dist-packages/sphinxbase

If you ever happen to want to link against installed libraries
in a given directory, LIBDIR, you must either use libtool, and
specify the full pathname of the library, or use the `-LLIBDIR'
flag during linking and do at least one of the following:
   - add LIBDIR to the `LD_LIBRARY_PATH' environment variable
     during execution
   - add LIBDIR to the `LD_RUN_PATH' environment variable
     during linking
   - use the `-Wl,-rpath -Wl,LIBDIR' linker flag
   - have your system administrator add LIBDIR to `/etc/ld.so.conf'

See any operating system documentation about shared libraries for
more information, such as the ld(1) and ld.so(8) manual pages.
----------------------------------------------------------------------
                        .
                        .
                        .
make[3]: Leaving directory `/home/josh/Desktop/sphinx-source/sphinxbase/swig'
make[2]: Leaving directory `/home/josh/Desktop/sphinx-source/sphinxbase/swig'
make[1]: Leaving directory `/home/josh/Desktop/sphinx-source/sphinxbase/swig'
make[1]: Entering directory `/home/josh/Desktop/sphinx-source/sphinxbase'
make[2]: Entering directory `/home/josh/Desktop/sphinx-source/sphinxbase'
make[2]: Nothing to be done for `install-exec-am'.
 /bin/mkdir -p '/usr/local/lib/pkgconfig'
 /usr/bin/install -c -m 644 sphinxbase.pc '/usr/local/lib/pkgconfig'
make[2]: Leaving directory `/home/josh/Desktop/sphinx-source/sphinxbase'
make[1]: Leaving directory `/home/josh/Desktop/sphinx-source/sphinxbase'
That’s it! You should have successfully installed sphinxbase. To check if you’ve actually installed it, just go to the terminal and do a tab-completion for sphinx_. You will see all the options of what you’ve just installed.
josh@yoga:~$ sphinx_
sphinx_cepview     sphinx_fe          sphinx_lm_convert  sphinx_pitch
sphinx_cont_seg    sphinx_jsgf2fsg    sphinx_lm_eval
At this point, if you try to run any one of these by entering it at the command line, you get an error:
josh@yoga:~$ sphinx_lm_convert
sphinx_lm_convert: error while loading shared libraries: libsphinxbase.so.3: cannot open shared object file: No such file or directory
This error has been answered by Nikolay Shmyrev on stackoverflow already, and the reason for this error is the following:
This error means that system fails to find the shared library in the location where it is installed. Most likely you installed it with default prefix /usr/local/lib which is not included into the library search path.
There’s a few ways to solve this problem. You may have come across this one which doesn’t work well:
josh@yoga:~$ export LD_LIBRARY_PATH=/usr/local/libThe problem is, this solution will work for as long as you’re in the same session in your terminal. When you logout and log back in, you will have to reset the variable again.
Rather, we can edit the file /etc/ld.so.conf so we always look into the right directory when we need to. If you take a look at the Linux Programmer’s Manual you find the following description:
/etc/ld.so.conf: File containing a list of directories, one per line, in which to search for libraries.
So, this is the right place to make a change.
If you take a look into the config file right now, you will probably just see one line:
josh@yoga:~$ cat /etc/ld.so.conf
include /etc/ld.so.conf.d/*.conf
We want to add /usr/local/lib to the file. So, you can use nano to open it up, and add a new line that just says /usr/local/lib. That’s it. Don’t delete anything else or add anything else or you might get some headaches.
josh@yoga:~$ sudo nano /etc/ld.so.confIf you’ve added that new line in via nano, you should see something like this:
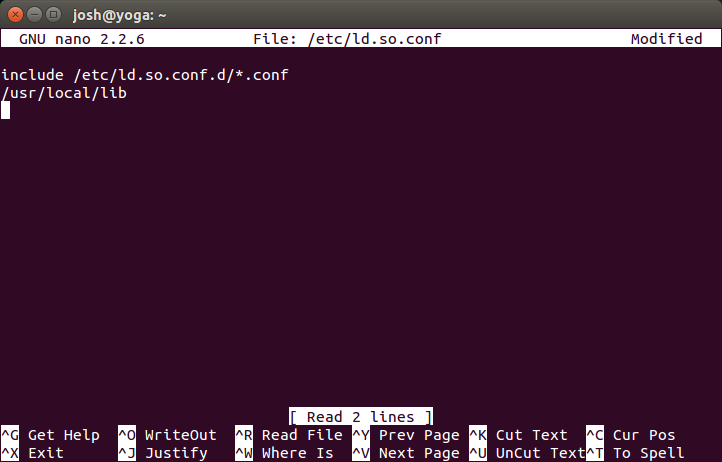
Now save the modified file (CTRL+o) and exit (CTRL+x).
Re-configure with the following command:
josh@yoga:~$ sudo ldconfigNow you can check that your computer is finding the shared libraries with the following:
josh@yoga:~$ ldconfig -p | grep local
	libsvn_ra_local-1.so.1 (libc6,x86-64) => /usr/lib/x86_64-linux-gnu/libsvn_ra_local-1.so.1
	libsphinxbase.so.3 (libc6,x86-64) => /usr/local/lib/libsphinxbase.so.3
	libsphinxbase.so (libc6,x86-64) => /usr/local/lib/libsphinxbase.so
Now you should be able to run the sphinxbase executables, and get a more reasonable error:
josh@yoga:~$ sphinx_lm_convert
ERROR: "cmd_ln.c", line 679: No arguments given, available options are:
Arguments list definition:
[NAME]		[DEFLT]	[DESCR]
-case			Ether 'lower' or 'upper' - case fold to lower/upper case (NOT UNICODE AWARE)
-debug			Verbosity level for debugging messages
-help		no	Shows the usage of the tool
-i			Input language model file (required)
-ifmt			Input language model format (will guess if not specified)
-lm_trie	no	Whether trie structure should be used for model holding during convertion
-logbase	1.0001	Base in which all log-likelihoods calculated
-mmap		no	Use memory-mapped I/O for reading binary LM files
-o			Output language model file (required)
-ofmt			Output language model file (will guess if not specified)
Installing pocketsphinx
Now that we’ve got sphinxbase installed successfully, we can move onto installing pocketsphinx. According to the description on the pocketsphinx GitHub repository:
PocketSphinx is a lightweight speech recognition engine, specifically tuned for handheld and mobile devices, though it works equally well on the desktop.
Still using sphinx-source as our current working directory, we can clone pocketsphinx from GitHub with the following command:
josh@yoga:~/Desktop/sphinx-source$ git clone https://github.com/cmusphinx/pocketsphinx.git
Cloning into 'pocketsphinx'...
remote: Counting objects: 11810, done.
remote: Total 11810 (delta 0), reused 0 (delta 0), pack-reused 11810
Receiving objects: 100% (11810/11810), 178.73 MiB | 11.30 MiB/s, done.
Resolving deltas: 100% (8831/8831), done.
Checking connectivity... done.
If we peek inside the current working directory, we will see we have a new directory:
josh@yoga:~/Desktop/sphinx-source$ la
pocketsphinx  sphinxbase
Now lets take a look at all the stuff we’ve just cloned:
josh@yoga:~/Desktop/sphinx-source$ la pocketsphinx
AUTHORS       doc      indent.sh  Makefile.am  pocketsphinx.pc.in  README.md   swig
autogen.sh    .git     LICENSE    model        pocketsphinx.sln    regression  test
configure.ac  include  m4         NEWS         README              src         win32
Looks pretty similar to what we found in our sphinxbase source directory, right?
It basically is, and we can run the same installation procedure as we did above. So now we cd into the dir itself and run autogen.sh. We get some output that looks like the following (again, I’ve truncated the output here).
josh@yoga:~/Desktop/sphinx-source$ cd pocketsphinx
josh@yoga:~/Desktop/sphinx-source/pocketsphinx$ ./autogen.sh
**Warning**: I am going to run `configure' with no arguments.
If you wish to pass any to it, please specify them on the
`./autogen.sh' command line.

processing .
Running libtoolize...
libtoolize: putting auxiliary files in `.'.
libtoolize: copying file `./ltmain.sh'
libtoolize: putting macros in AC_CONFIG_MACRO_DIR, `m4'.
libtoolize: copying file `m4/libtool.m4'
libtoolize: copying file `m4/ltoptions.m4'
libtoolize: copying file `m4/ltsugar.m4'
libtoolize: copying file `m4/ltversion.m4'
libtoolize: copying file `m4/lt~obsolete.m4'
Running aclocal  ...
Running automake --foreign --copy  ...
configure.ac:11: installing './compile'
configure.ac:10: installing './config.guess'
configure.ac:10: installing './config.sub'
configure.ac:5: installing './install-sh'
                    .
                    .
                    .
config.status: creating model/Makefile
config.status: creating test/Makefile
config.status: creating test/testfuncs.sh
config.status: creating test/unit/Makefile
config.status: creating test/regression/Makefile
config.status: executing depfiles commands
config.status: executing libtool commands
Now type `make' to compile the package.
Now we’ve made all our necessary Makefiles, and we can see them in the pocketsphinx directory.
josh@yoga:~/Desktop/sphinx-source/pocketsphinx$ la
aclocal.m4      configure     libtool      model               README.md
AUTHORS         configure.ac  LICENSE      NEWS                regression
autogen.sh      doc           m4           pocketsphinx.pc     src
autom4te.cache  .git          Makefile     pocketsphinx.pc.in  swig
config.log      include       Makefile.am  pocketsphinx.sln    test
config.status   indent.sh     Makefile.in  README              win32
Same as we did above for sphinxbase, we run make now.
josh@yoga:~/Desktop/sphinx-source/pocketsphinx$ make
                             .
                             .
                             .
libtool: link: (cd ".libs" && rm -f "_pocketsphinx.so.0" && ln -s "_pocketsphinx.so.0.0.0" "_pocketsphinx.so.0")
libtool: link: (cd ".libs" && rm -f "_pocketsphinx.so" && ln -s "_pocketsphinx.so.0.0.0" "_pocketsphinx.so")
libtool: link: ar cru .libs/_pocketsphinx.a  pocketsphinx_wrap.o
libtool: link: ranlib .libs/_pocketsphinx.a
libtool: link: ( cd ".libs" && rm -f "_pocketsphinx.la" && ln -s "../_pocketsphinx.la" "_pocketsphinx.la" )
make[3]: Leaving directory `/home/josh/Desktop/sphinx-source/pocketsphinx/swig/python'
make[2]: Leaving directory `/home/josh/Desktop/sphinx-source/pocketsphinx/swig/python'
make[2]: Entering directory `/home/josh/Desktop/sphinx-source/pocketsphinx/swig'
make[2]: Nothing to be done for `all-am'.
make[2]: Leaving directory `/home/josh/Desktop/sphinx-source/pocketsphinx/swig'
make[1]: Leaving directory `/home/josh/Desktop/sphinx-source/pocketsphinx/swig'
make[1]: Entering directory `/home/josh/Desktop/sphinx-source/pocketsphinx'
make[1]: Nothing to be done for `all-am'.
make[1]: Leaving directory `/home/josh/Desktop/sphinx-source/pocketsphinx'
And now we can actually do the installation with make install and root privledges.
josh@yoga:~/Desktop/sphinx-source/pocketsphinx$ sudo make install
Making install in src
make[1]: Entering directory `/home/josh/Desktop/sphinx-source/pocketsphinx/src'
Making install in libpocketsphinx
make[2]: Entering directory `/home/josh/Desktop/sphinx-source/pocketsphinx/src/libpocketsphinx'
make[3]: Entering directory `/home/josh/Desktop/sphinx-source/pocketsphinx/src/libpocketsphinx'
                             .
                             .
                             .
libtool: install: /usr/bin/install -c .libs/libpocketsphinx.lai /usr/local/lib/libpocketsphinx.la
libtool: install: /usr/bin/install -c .libs/libpocketsphinx.a /usr/local/lib/libpocketsphinx.a
libtool: install: chmod 644 /usr/local/lib/libpocketsphinx.a
libtool: install: ranlib /usr/local/lib/libpocketsphinx.a
libtool: finish: PATH="/usr/local/sbin:/usr/local/bin:/usr/sbin:/usr/bin:/sbin:/bin:/sbin" ldconfig -n /usr/local/lib
----------------------------------------------------------------------
Libraries have been installed in:
   /usr/local/lib

If you ever happen to want to link against installed libraries
in a given directory, LIBDIR, you must either use libtool, and
specify the full pathname of the library, or use the `-LLIBDIR'
flag during linking and do at least one of the following:
   - add LIBDIR to the `LD_LIBRARY_PATH' environment variable
     during execution
   - add LIBDIR to the `LD_RUN_PATH' environment variable
     during linking
   - use the `-Wl,-rpath -Wl,LIBDIR' linker flag
   - have your system administrator add LIBDIR to `/etc/ld.so.conf'

See any operating system documentation about shared libraries for
more information, such as the ld(1) and ld.so(8) manual pages.
----------------------------------------------------------------------
                             .
                             .
                             .
----------------------------------------------------------------------
Libraries have been installed in:
   /usr/local/lib/python2.7/dist-packages/pocketsphinx

If you ever happen to want to link against installed libraries
in a given directory, LIBDIR, you must either use libtool, and
specify the full pathname of the library, or use the `-LLIBDIR'
flag during linking and do at least one of the following:
   - add LIBDIR to the `LD_LIBRARY_PATH' environment variable
     during execution
   - add LIBDIR to the `LD_RUN_PATH' environment variable
     during linking
   - use the `-Wl,-rpath -Wl,LIBDIR' linker flag
   - have your system administrator add LIBDIR to `/etc/ld.so.conf'

See any operating system documentation about shared libraries for
more information, such as the ld(1) and ld.so(8) manual pages.
----------------------------------------------------------------------
                             .
                             .
                             .
make[3]: Leaving directory `/home/josh/Desktop/sphinx-source/pocketsphinx/swig'
make[2]: Leaving directory `/home/josh/Desktop/sphinx-source/pocketsphinx/swig'
make[1]: Leaving directory `/home/josh/Desktop/sphinx-source/pocketsphinx/swig'
make[1]: Entering directory `/home/josh/Desktop/sphinx-source/pocketsphinx'
make[2]: Entering directory `/home/josh/Desktop/sphinx-source/pocketsphinx'
make[2]: Nothing to be done for `install-exec-am'.
 /bin/mkdir -p '/usr/local/lib/pkgconfig'
 /usr/bin/install -c -m 644 pocketsphinx.pc '/usr/local/lib/pkgconfig'
make[2]: Leaving directory `/home/josh/Desktop/sphinx-source/pocketsphinx'
make[1]: Leaving directory `/home/josh/Desktop/sphinx-source/pocketsphinx'
Let’s see if we got something. If you type in pocketsphinx_ and do a tab completion to list all options, you should see something like this:
josh@yoga:~/Desktop/sphinx-source/pocketsphinx$ pocketsphinx_
pocketsphinx_batch         pocketsphinx_continuous    pocketsphinx_mdef_convert
Now if you try to run one of them, we get a sensible error that says we didn’t supply any of the needed arguments.
josh@yoga:~/Desktop/sphinx-source/pocketsphinx$ pocketsphinx_continuous
ERROR: "cmd_ln.c", line 679: No arguments given, available options are:
Arguments list definition:
[NAME]			[DEFLT]		[DESCR]
-adcdev					Name of audio device to use for input.
-agc			none		Automatic gain control for c0 ('max', 'emax', 'noise', or 'none')
-agcthresh		2.0		Initial threshold for automatic gain control
-allphone				Perform phoneme decoding with phonetic lm
-allphone_ci		no		Perform phoneme decoding with phonetic lm and context-independent units only
-alpha			0.97		Preemphasis parameter
                              .
                              .
                              .
-varfloor		0.0001		Mixture gaussian variance floor (applied to data from -var file)
-varnorm		no		Variance normalize each utterance (only if CMN == current)
-verbose		no		Show input filenames
-warp_params				Parameters defining the warping function
-warp_type		inverse_linear	Warping function type (or shape)
-wbeam			7e-29		Beam width applied to word exits
-wip			0.65		Word insertion penalty
-wlen			0.025625	Hamming window length

INFO: continuous.c(295): Specify '-infile <file.wav>' to recognize from file or '-inmic yes' to recognize from microphone.
Huzzah! We now have a functional version of pocketsphinx installed with all it’s sphinxbase dependencies (if you followed the first section). If you already have a language model, an acoustic model, and a phonetic dictionary, you’re good to go!
However, if you’d like to train or adapt an acoustic model, you need to install sphinxtrain as shown below.
Installing sphinxtrain
Let’s clone sphinxtrain into the temporary directory we’ve been using to store our source code (sphinx-source):
josh@yoga:~/Desktop/sphinx-source$ git clone https://github.com/cmusphinx/sphinxtrain.git
Cloning into 'sphinxtrain'...
remote: Counting objects: 15997, done.
remote: Total 15997 (delta 0), reused 0 (delta 0), pack-reused 15997
Receiving objects: 100% (15997/15997), 13.15 MiB | 1.80 MiB/s, done.
Resolving deltas: 100% (11174/11174), done.
Checking connectivity... done.
If we look inside the temorary directory, we see sphinxtrain right where it should be, alongside our other directories of source code.
josh@yoga:~/Desktop/sphinx-source$ la
pocketsphinx  sphinxbase  sphinxtrain
Now, if we look inside this new sourcecode, we will see something pretty familiar.
josh@yoga:~/Desktop/sphinx-source$ la sphinxtrain
AUTHORS       etc      LICENSE      NEWS    scripts          templates
autogen.sh    .git     m4           python  SphinxTrain.sln  test
configure.ac  include  Makefile.am  README  src              win32
Let’s cd into sphinxtrain and run the script which generates the Makefiles.
josh@yoga:~/Desktop/sphinx-source$ cd sphinxtrain
josh@yoga:~/Desktop/sphinx-source/sphinxtrain$ ./autogen.sh
**Warning**: I am going to run `configure' with no arguments.
If you wish to pass any to it, please specify them on the
`./autogen.sh' command line.

processing .
Running libtoolize...
libtoolize: putting auxiliary files in `.'.
libtoolize: copying file `./ltmain.sh'
libtoolize: putting macros in AC_CONFIG_MACRO_DIR, `m4'.
libtoolize: copying file `m4/libtool.m4'
libtoolize: copying file `m4/ltoptions.m4'
libtoolize: copying file `m4/ltsugar.m4'
libtoolize: copying file `m4/ltversion.m4'
                      .
                      .
                      .
config.status: creating src/programs/param_cnt/Makefile
config.status: creating src/programs/printp/Makefile
config.status: creating src/programs/prunetree/Makefile
config.status: creating src/programs/tiestate/Makefile
config.status: creating test/Makefile
config.status: executing depfiles commands
config.status: executing libtool commands
Now type `make' to compile the package.
Let’s take a look at what we just did.
josh@yoga:~/Desktop/sphinx-source/sphinxtrain$ la
aclocal.m4      config.status  include     Makefile.am  SphinxTrain.sln
AUTHORS         config.sub     install-sh  Makefile.in  src
autogen.sh      configure      libtool     missing      templates
autom4te.cache  configure.ac   LICENSE     NEWS         test
compile         depcomp        ltmain.sh   python       win32
config.guess    etc            m4          README
config.log      .git           Makefile    scripts
As with all the other installations, we now compile with make.
josh@yoga:~/Desktop/sphinx-source/sphinxtrain$ make
                            .
                            .
                            .
make[3]: Leaving directory `/home/josh/Desktop/sphinx-source/sphinxtrain/src/programs/tiestate'
make[3]: Entering directory `/home/josh/Desktop/sphinx-source/sphinxtrain/src/programs'
make[3]: Nothing to be done for `all-am'.
make[3]: Leaving directory `/home/josh/Desktop/sphinx-source/sphinxtrain/src/programs'
make[2]: Leaving directory `/home/josh/Desktop/sphinx-source/sphinxtrain/src/programs'
make[2]: Entering directory `/home/josh/Desktop/sphinx-source/sphinxtrain/src'
make[2]: Nothing to be done for `all-am'.
make[2]: Leaving directory `/home/josh/Desktop/sphinx-source/sphinxtrain/src'
make[1]: Leaving directory `/home/josh/Desktop/sphinx-source/sphinxtrain/src'
Making all in test
make[1]: Entering directory `/home/josh/Desktop/sphinx-source/sphinxtrain/test'
make[1]: Nothing to be done for `all'.
make[1]: Leaving directory `/home/josh/Desktop/sphinx-source/sphinxtrain/test'
make[1]: Entering directory `/home/josh/Desktop/sphinx-source/sphinxtrain'
make[1]: Nothing to be done for `all-am'.
make[1]: Leaving directory `/home/josh/Desktop/sphinx-source/sphinxtrain'
Moving right along, we can run make install to seal the deal.
josh@yoga:~/Desktop/sphinx-source/sphinxtrain$ sudo make install
                            .
                            .
                            .
make[2]: Entering directory `/home/josh/Desktop/sphinx-source/sphinxtrain/src'
make[3]: Entering directory `/home/josh/Desktop/sphinx-source/sphinxtrain/src'
make[3]: Nothing to be done for `install-exec-am'.
make[3]: Nothing to be done for `install-data-am'.
make[3]: Leaving directory `/home/josh/Desktop/sphinx-source/sphinxtrain/src'
make[2]: Leaving directory `/home/josh/Desktop/sphinx-source/sphinxtrain/src'
make[1]: Leaving directory `/home/josh/Desktop/sphinx-source/sphinxtrain/src'
Making install in test
make[1]: Entering directory `/home/josh/Desktop/sphinx-source/sphinxtrain/test'
make[2]: Entering directory `/home/josh/Desktop/sphinx-source/sphinxtrain/test'
make[2]: Nothing to be done for `install-exec-am'.
make[2]: Nothing to be done for `install-data-am'.
make[2]: Leaving directory `/home/josh/Desktop/sphinx-source/sphinxtrain/test'
make[1]: Leaving directory `/home/josh/Desktop/sphinx-source/sphinxtrain/test'
make[1]: Entering directory `/home/josh/Desktop/sphinx-source/sphinxtrain'
make[2]: Entering directory `/home/josh/Desktop/sphinx-source/sphinxtrain'
make[2]: Nothing to be done for `install-exec-am'.
make[2]: Nothing to be done for `install-data-am'.
make[2]: Leaving directory `/home/josh/Desktop/sphinx-source/sphinxtrain'
make[1]: Leaving directory `/home/josh/Desktop/sphinx-source/sphinxtrain'
Hopefully now you can try out sphinxtrain and get some sensible output:
josh@yoga:~/Desktop/sphinx-source/sphinxtrain$ sphinxtrain

Sphinxtrain processes the audio files and creates and acoustic model
for CMUSphinx toolkit. The data needs to have a certain layout
See the tutorial http://cmusphinx.sourceforge.net/wiki/tutorialam
for details

Usage: sphinxtrain [options] <command>

Commands:
     -t <task> setup - copy configuration into database
     [-s <stage1,stage2,stage3>] [-f <stage>] run - run the training or just selected stages
You should be ready to go now!
Hopefully this was helpful for you. If you ran into issues or have suggestions on how to make this better, be sure to leave a comment!
Installing cmuclmtk
I can’t seem to find the code on CMU-Sphinx’s GitHub account, so I’m just went through sourceforge instead.
NB A reader recommended to try this link from svn instead: svn://svn.code.sf.net/p/cmusphinx/code/trunk/cmuclmtk
josh@yoga:~/Desktop$ svn checkout svn://svn.code.sf.net/p/cmusphinx/code/trunk cmusphinx-code
                           .
                           .
                           .
A    cmusphinx-code/logios/Tools/MakeLM/bin/x86-nt/wfreq2vocab.exe
A    cmusphinx-code/logios/Tools/MakeLM/bin/x86-nt/idngram2stats.exe
A    cmusphinx-code/logios/Tools/MakeLM/bin/x86-nt/text2wngram.exe
A    cmusphinx-code/logios/Tools/MakeLM/bin/x86-nt/lm_combine.exe
A    cmusphinx-code/logios/Tools/MakeLM/bin/x86-nt/interpolate.exe
A    cmusphinx-code/logios/Tools/MakeLM/bin/x86-nt/binlm2arpa.exe
A    cmusphinx-code/logios/Tools/MakeLM/bin/x86-nt/phoenix2corpus.exe
A    cmusphinx-code/logios/Tools/MakeLM/bin/x86-nt/text2idngram.exe
A    cmusphinx-code/logios/Tools/MakeLM/bin/x86-nt/ngram2mgram.exe
A    cmusphinx-code/logios/Tools/MakeLM/bin/x86-nt/text2wfreq.exe
A    cmusphinx-code/logios/Tools/MakeLM/bin/x86-nt/idngram2lm.exe
Checked out external at revision 10678.

Checked out revision 13167.
As you can see below, we just downloaded pretty much everything they’ve got. Importantly, cmuclmtk is there, too.
josh@yoga:~/Desktop$ cd cmusphinx-code/
josh@yoga:~/Desktop/cmusphinx-code$ la
cmuclmtk  htk2s3conv  multisphinx   pocketsphinx-android       sphinx2  sphinx4     sphinxtrain
cmudict   logios      pocketsphinx  pocketsphinx-android-demo  sphinx3  sphinxbase  .svn
Let’s cd into cmuclmtk and take a look:
josh@yoga:~/Desktop/cmusphinx-code$ cd cmuclmtk/
josh@yoga:~/Desktop/cmusphinx-code/cmuclmtk$ la
AUTHORS     ChangeLog     configure.ac  doc      Makefile.am  perl    src   TODO
autogen.sh  cmuclmtk.sln  debian        LICENSE  NEWS         README  test  win32
Familiar set up, right? We do the same steps as before, starting with ./autogen.sh.
josh@yoga:~/Desktop/cmusphinx-code/cmuclmtk$ ./autogen.sh
**Warning**: I am going to run `configure' with no arguments.
If you wish to pass any to it, please specify them on the
`./autogen.sh' command line.

processing .
Running libtoolize...
libtoolize: putting auxiliary files in `.'.
libtoolize: copying file `./ltmain.sh'
libtoolize: putting macros in AC_CONFIG_MACRO_DIR, `m4'.
libtoolize: copying file `m4/libtool.m4'
libtoolize: copying file `m4/ltoptions.m4'
libtoolize: copying file `m4/ltsugar.m4'
libtoolize: copying file `m4/ltversion.m4'
              .
              .
              .
config.status: creating Makefile
config.status: creating src/Makefile
config.status: creating test/Makefile
config.status: creating src/liblmest/Makefile
config.status: creating src/libs/Makefile
config.status: creating src/programs/Makefile
config.status: creating config.h
config.status: executing depfiles commands
config.status: executing libtool commands
Now type `make' to compile the package.
Here’s all the things we’ve just generated:
josh@yoga:~/Desktop/cmusphinx-code/cmuclmtk$ la
aclocal.m4      cmuclmtk.sln  config.log     debian      LICENSE      Makefile.in  src
AUTHORS         compile       config.status  depcomp     ltmain.sh    missing      stamp-h1
autogen.sh      config.guess  config.sub     doc         m4           NEWS         test
autom4te.cache  config.h      configure      install-sh  Makefile     perl         TODO
ChangeLog       config.h.in   configure.ac   libtool     Makefile.am  README       win32
Now we run make.
josh@yoga:~/Desktop/cmusphinx-code/cmuclmtk$ make
                       .
                       .
                       .
libtool: link: gcc -I../../src/libs -I../../src/liblmest -I../../src/win32 -g -O2 -o .libs/lm_combine lm_combine.o  ../../src/.libs/libcmuclmtk.so -lm
make[3]: Leaving directory `/home/josh/Desktop/cmusphinx-code/cmuclmtk/src/programs'
make[2]: Leaving directory `/home/josh/Desktop/cmusphinx-code/cmuclmtk/src'
Making all in test
make[2]: Entering directory `/home/josh/Desktop/cmusphinx-code/cmuclmtk/test'
make[2]: Nothing to be done for `all'.
make[2]: Leaving directory `/home/josh/Desktop/cmusphinx-code/cmuclmtk/test'
make[2]: Entering directory `/home/josh/Desktop/cmusphinx-code/cmuclmtk'
make[2]: Nothing to be done for `all-am'.
make[2]: Leaving directory `/home/josh/Desktop/cmusphinx-code/cmuclmtk'
make[1]: Leaving directory `/home/josh/Desktop/cmusphinx-code/cmuclmtk'
And finally, sudo make install.
josh@yoga:~/Desktop/cmusphinx-code/cmuclmtk$ sudo make install
[sudo] password for josh:
Making install in src
make[1]: Entering directory `/home/josh/Desktop/cmusphinx-code/cmuclmtk/src'
                              .
                              .
                              .
----------------------------------------------------------------------
Libraries have been installed in:
   /usr/local/lib

If you ever happen to want to link against installed libraries
in a given directory, LIBDIR, you must either use libtool, and
specify the full pathname of the library, or use the `-LLIBDIR'
flag during linking and do at least one of the following:
   - add LIBDIR to the `LD_LIBRARY_PATH' environment variable
     during execution
   - add LIBDIR to the `LD_RUN_PATH' environment variable
     during linking
   - use the `-Wl,-rpath -Wl,LIBDIR' linker flag
   - have your system administrator add LIBDIR to `/etc/ld.so.conf'

See any operating system documentation about shared libraries for
more information, such as the ld(1) and ld.so(8) manual pages.
----------------------------------------------------------------------
                              .
                              .
                              .
make[1]: Leaving directory `/home/josh/Desktop/cmusphinx-code/cmuclmtk/test'
make[1]: Entering directory `/home/josh/Desktop/cmusphinx-code/cmuclmtk'
make[2]: Entering directory `/home/josh/Desktop/cmusphinx-code/cmuclmtk'
make[2]: Nothing to be done for `install-exec-am'.
make[2]: Nothing to be done for `install-data-am'.
make[2]: Leaving directory `/home/josh/Desktop/cmusphinx-code/cmuclmtk'
make[1]: Leaving directory `/home/josh/Desktop/cmusphinx-code/cmuclmtk'
Now we can see a couple of the executables if we do a tab completion as such:
josh@yoga:~/Desktop/cmusphinx-code/cmuclmtk$ text2
text2idngram  text2wfreq    text2wngram
And if we run one without input, it hangs up and runs for a while, but works.
josh@yoga:~/Desktop/cmusphinx-code/cmuclmtk$ text2wfreq
text2wfreq : Reading text from standard input...